Site Settings is where you control the behind-the-scenes details of your website -- things like your logo, search engine preferences, analytics, and social media links. Most of these are "set it and forget it" options that you configure once when you build your site.
Where to Find Site Settings
- Open your WebNesting dashboard.
- Click Settings in the left sidebar.
- You will see several sections organized by category. Click on any section to expand it and make changes.
SEO Settings
SEO stands for Search Engine Optimization. These settings help search engines like Google understand your site and display it correctly in search results.
Default Page Title
This is the name that appears in browser tabs and in search engine results for pages that do not have their own custom title.
- Go to Settings and open the SEO section.
- Find the Default Page Title field.
- Enter a clear, descriptive title for your website. For example: "Smith & Co. Accounting -- Tax Services in Portland."
- Save your changes.
Tip: Keep your title under 60 characters so it does not get cut off in search results.
Default Meta Description
This is the short summary that appears below your site's title in search engine results. It helps visitors decide whether to click through to your site.
- In the SEO section, find the Default Meta Description field.
- Write a brief, compelling description of your website (one to two sentences).
- Save your changes.
Tip: Write a description between 120 and 160 characters. Include your most important keywords naturally -- do not stuff keywords in unnaturally.
Default Social Sharing Image (OG Image)
When someone shares a link to your site on social media (Facebook, LinkedIn, X, etc.), this image will appear alongside the link. It is sometimes called an OG image (Open Graph image).
- In the SEO section, find the Social Sharing Image setting.
- Click to choose an image from your Media Library, or upload a new one.
- Save your changes.
Tip: Use an image that is at least 1200 x 630 pixels for the best results across all platforms.
Blocking Search Engines
If your site is not ready for the public yet (for example, if you are still building it), you can tell search engines not to list it in their results.
- In the SEO section, look for the Search Engine Visibility or Block Search Engines option.
- Turn it on to hide your site from search engines.
- Save your changes.
Important: Remember to turn this off when your site is ready to launch. If you leave it on, visitors will not be able to find your site through Google or other search engines.
Tip: This setting adds a note to your site that asks search engines not to index it. Most major search engines respect this, but it is a request, not a guarantee.
Sitemap Preferences
A sitemap is a file that lists all the pages on your site. Search engines use it to find and index your content more efficiently.
- In the SEO section, look for Sitemap settings.
- Choose whether to automatically generate a sitemap for your site.
- Save your changes.
In most cases, you should leave the automatic sitemap turned on. It updates itself whenever you add, change, or remove pages.
Google Settings
WebNesting makes it easy to connect your site to Google's tools for tracking visitors and understanding how people use your site. These settings are found under Third Party Config Settings in the Settings page.
Connecting Google Analytics
Google Analytics shows you detailed information about your visitors -- how many people visit, where they come from, which pages they view, and more.
- Go to Settings and open the Third Party section, then click Google Config Settings.
- Find the Analytics Tracking ID field.
- Enter your Google Analytics Tracking ID. It looks something like
UA-XXXXXXXX. TheUA-prefix is shown automatically -- just enter the numbers after it. - Save your changes.
If you do not have a Google Analytics account yet:
- Go to analytics.google.com.
- Sign in with your Google account and follow the steps to create a new property for your website.
- Copy the Tracking ID and paste it into WebNesting.
Tip: It can take 24 to 48 hours for data to start appearing in your Google Analytics dashboard after you first connect it.
Google Tag Manager Setup
Google Tag Manager lets you manage multiple tracking tools (like Google Analytics, Facebook Pixel, and others) from a single place, without needing to edit your website directly.
- In the Google Config Settings section, find the Tag Manager field.
- Enter your Tag Manager Container ID. It looks something like
GTM-XXXXXXX. - Save your changes.
Tip: If you are only using Google Analytics, you do not need Google Tag Manager. It is an optional tool for people who want to manage several tracking services at once.
Enabling WebNesting's Built-In Analytics
WebNesting includes its own simple analytics tool that shows you visitor statistics right inside your dashboard -- no external accounts needed.
- In the Google Config Settings section, find the Built-In Analytics toggle.
- Turn it on.
- Save your changes.
Once enabled, you will see visitor data directly on your WebNesting dashboard, including page views, visitor counts, and popular pages.
Tip: You can use WebNesting's built-in analytics alongside Google Analytics. They work independently and will not interfere with each other.
Social Media Profiles
Add your social media links so they can appear in your site's header, footer, or anywhere you use social media components.
Adding Your Social Media Links
- Go to Settings and open the Third Party section, then click Social Config Settings.
- You will see fields for each supported platform.
- Paste the full URL of your profile for each platform. For example:
https://www.instagram.com/yourcompany. - Save your changes.
Default Platforms
WebNesting includes fields for the following social media platforms by default:
- YouTube
You can also add additional social platforms using the custom entry form on the social settings page. You only need to fill in the platforms you use. Leave the rest blank.
Tip: Make sure to enter the complete URL for each profile, including the
https://part. For example, usehttps://www.facebook.com/yourpagerather than justfacebook.com/yourpage.
Site Images
These are the key images that represent your brand across your website and beyond. They are found under Content Items in the Settings page.
Setting Your Logo
Your logo appears in your site's header and anywhere else your theme displays it.
- Go to Settings and open the Content Items section, then click Image.
- Find the Logo field.
- Click to choose an image from your Media Library, or upload a new one.
- Save your changes.
Tip: Upload your logo as a PNG file with a transparent background. This ensures it looks good on any background color. SVG format also works well for logos.
Setting Your Favicon
A favicon is the tiny icon that appears in browser tabs next to your page title. It also shows up in bookmark lists and on mobile home screens.
- In the Image section under Content Items, find the Favicon field.
- Click to choose an image from your Media Library, or upload a new one.
- Save your changes.
Tip: Favicons should be square and simple. A good size is 512 x 512 pixels. Complex images will be hard to see at such a small size, so use a simple icon or the first letter of your brand name.
Setting the Social Sharing Image
This is the same image described in the SEO section above. It appears when someone shares a link to your site on social media.
- In the Image section under Content Items, find the Social Sharing Image field.
- Click to choose an image from your Media Library, or upload a new one.
- Save your changes.
This image can also be set in the SEO section. They point to the same setting, so you only need to set it in one place.
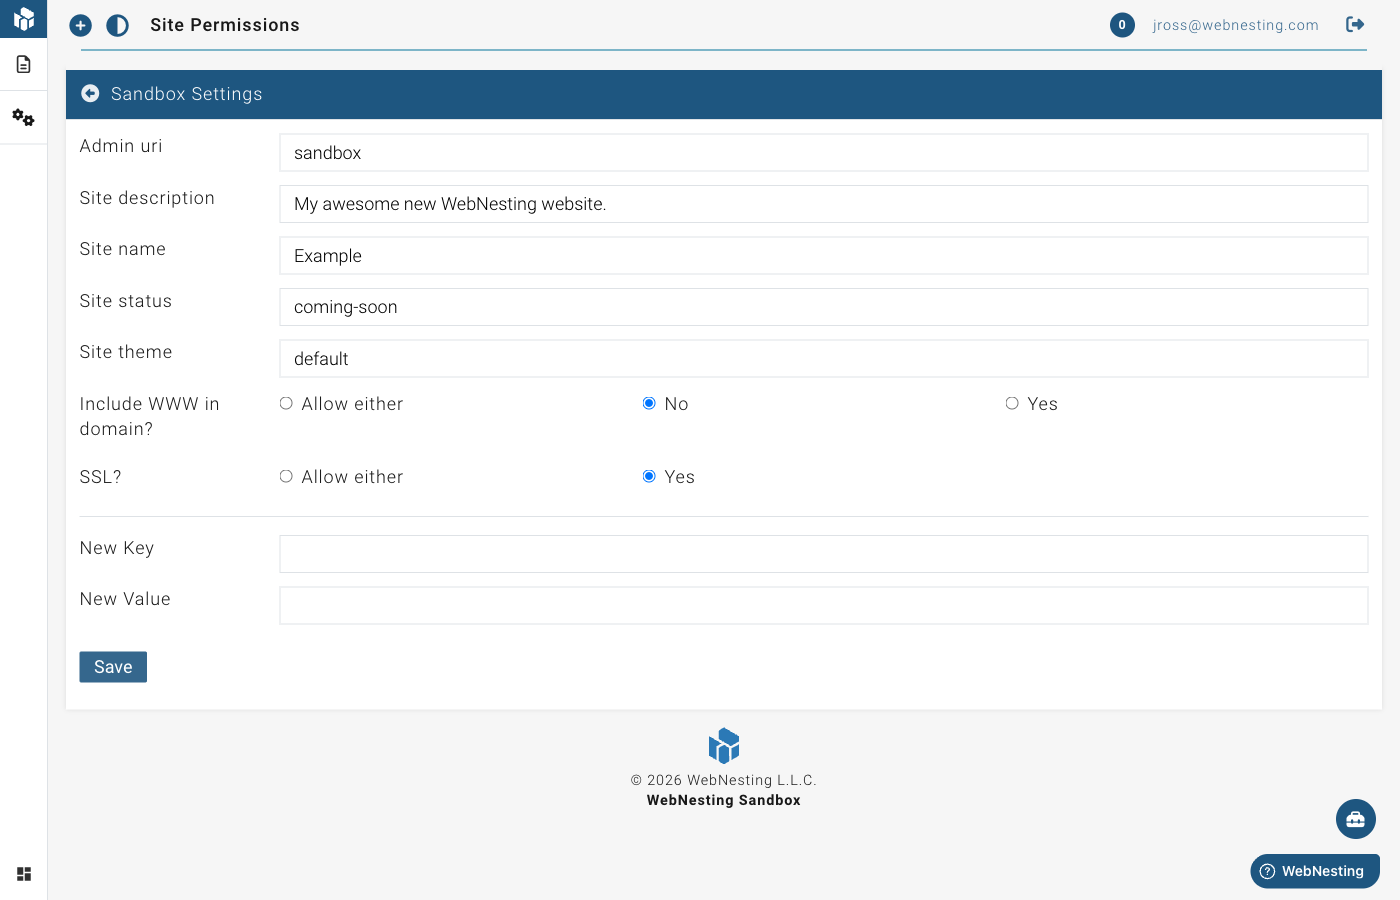
Sandbox Settings
These settings control foundational aspects of how your website works. They are found under Site Config in the Settings page.
SSL Preferences (HTTPS)
SSL makes your site secure by encrypting the connection between your visitors and your website. When SSL is active, your site address starts with https:// instead of http://, and visitors see a lock icon in their browser.
- Go to Settings and open the Site Config section, then click Sandbox Config.
- Find the SSL / HTTPS setting.
- Make sure it is turned on.
- Save your changes.
Tip: SSL should always be turned on. It protects your visitors, builds trust, and is required by most search engines for good rankings.
WWW Preferences
You can choose whether your site address uses "www" or not.
- With WWW:
www.yoursite.webnesting.site - Without WWW:
yoursite.webnesting.site - Allow either: Both versions work without redirecting
Most modern sites use the non-www version. Choose whichever version you prefer and stick with it, so search engines do not see them as two different sites.
- In the Sandbox Config section, find the Include WWW in domain? setting.
- Choose Yes (always use www), No (never use www), or Allow either (accept both without redirecting).
- Save your changes.
If you choose Yes or No, WebNesting will automatically redirect visitors to your preferred version, so no one will land on the wrong one.
Custom Settings
Depending on your site's theme and configuration, you may see additional custom settings in this area. These could include things like:
- Custom colors or branding options.
- Footer text or copyright notices.
- Cookie consent or privacy notices.
- Other options specific to your site's theme.
If you see a setting you are not sure about, hover over it or look for a help icon nearby for a brief explanation of what it does.
Tip: After making changes to any settings, visit your live site in a new browser tab to confirm everything looks the way you expect.
Custom Domain
By default, your website is available on a WebNesting subdomain (like yoursite.webnesting.site). If you want to use your own domain name (like www.yourcompany.com), you can connect it in your site settings.
What Is a Custom Domain?
A custom domain is a web address you own, like www.yourcompany.com. Using your own domain makes your site look more professional and is easier for visitors to remember.
How to Add a Custom Domain
- Go to Settings in your dashboard.
- Open the Domain section.
- Enter your custom domain name (for example,
www.yourcompany.com). - Save your changes.
WebNesting will display the DNS records you need to set up with your domain provider.
Setting Up DNS Records
After adding your domain in WebNesting, you need to update the DNS settings with your domain registrar (the company where you bought your domain, like GoDaddy, Namecheap, or Google Domains).
- Log in to your domain registrar's website.
- Find the DNS settings or DNS management area.
- Add the records that WebNesting provided:
- For a root domain (like
yourcompany.com), add an A record pointing to the IP address shown in your WebNesting settings. - For a subdomain (like
www.yourcompany.com), add a CNAME record pointing to the address shown in your WebNesting settings.
- For a root domain (like
- Save your DNS changes.
Tip: DNS changes can take anywhere from a few minutes to 48 hours to take effect. This is normal and depends on your domain registrar.
SSL Certificate (HTTPS)
Once your DNS records are set up and pointing to WebNesting, an SSL certificate will be automatically provisioned for your domain. This ensures your site uses https:// and visitors see the secure lock icon in their browser.
SSL provisioning usually completes within a few minutes after DNS is connected, but it can take up to an hour in some cases.
Troubleshooting Domain Issues
If your custom domain is not working after setup:
- "Site not found" error -- DNS records may not have propagated yet. Wait up to 48 hours and try again.
- Security warning in browser -- The SSL certificate may still be provisioning. Wait a few minutes and refresh.
- Wrong site appears -- Double-check that your DNS records point to the correct WebNesting addresses. Your DNS records should include a CNAME record pointing to your WebNesting site address (shown in Site Settings under Custom Domain).
- Domain works without WWW but not with it (or vice versa) -- Make sure you have set up DNS records for both versions, or configure your WWW preference in the General Settings section above.
If you are still having trouble after 48 hours, contact support with your domain name and a screenshot of your DNS settings.
Last updated: February 12, 2026
Was this article helpful?
That’s Great!
Thank you for your feedback
Sorry! We couldn't be helpful
Thank you for your feedback
Feedback sent
We appreciate your effort and will try to fix the article