All your hard work designing and building your site leads to this: getting it live for the world to see. This guide explains the difference between saving and publishing, how to use undo and redo, and all the keyboard shortcuts that make your workflow faster.
Saving vs. Publishing: What Is the Difference?
These two actions do very different things:
- Save stores your changes as a draft. Only you can see your saved work. Your visitors will not see any changes until you publish.
- Publish takes your saved work and makes it live on your website. Once you publish, anyone who visits your site will see the updated version.
Think of it like writing a letter. Saving is like putting the letter in your desk drawer -- it is safe, but nobody else can see it. Publishing is like putting the letter in the mailbox -- now everyone can read it.
How to Save Your Work
You have three ways to save your work in the builder.
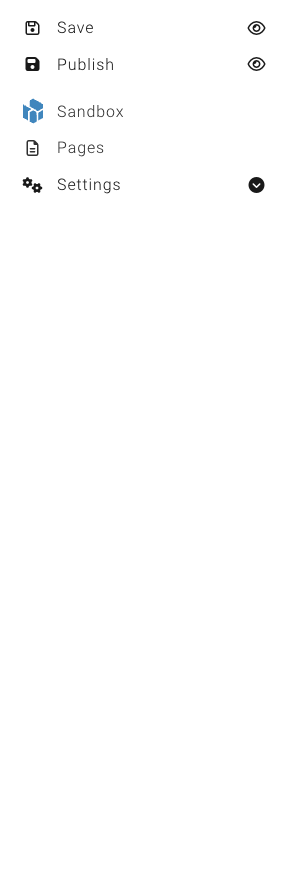
Option 1: Click the Save Button
- Look at the top toolbar of the builder.
- Click the Save button.
- You will see a confirmation that your work has been saved.
Option 2: Use a Keyboard Shortcut
This is the fastest way to save.
- On Windows: Press Ctrl + S
- On Mac: Press Cmd + S
Your work saves instantly without needing to click anything.
Option 3: Auto-Save
WebNesting automatically saves your work as you go. After you make changes and pause for a few seconds, the builder quietly saves your progress in the background. You may notice a small auto-save indicator in the toolbar when this happens.
Auto-save is a safety net. It protects you from losing work if your internet connection drops or if you accidentally close the browser. But you should still save manually before important milestones, just to be safe.
If your internet connection drops while editing, the builder will try to save your changes when the connection is restored. Your most recent changes are preserved locally until the save completes.
Tip: Get in the habit of pressing Ctrl+S (or Cmd+S) frequently while working. It takes less than a second and gives you peace of mind.
How to Publish Your Site
When you are happy with your changes and ready for visitors to see them, it is time to publish.
- Look at the top toolbar of the builder.
- Click the Publish button.
- Confirm that you want to publish.
- Your changes will go live within moments.
What Happens When You Publish
- Your saved draft becomes the live version of your site.
- Anyone who visits your site's web address will see the updated content.
- The published version replaces the previously published version.
Before publishing, you can preview your site using the responsive preview controls in the builder to see how it will look on different devices.
Tip: Before publishing, do a quick review. Switch through the different device views (desktop, tablet, mobile) to make sure everything looks good at all sizes. Check your text for typos. Click through your links to make sure they work.
Undo and Redo
Made a mistake? No problem. The builder keeps a history of your recent actions so you can step backward and forward through your changes.
Undoing a Mistake
To undo your last action:
- On Windows: Press Ctrl + Z
- On Mac: Press Cmd + Z
Each time you press the shortcut, you go back one step. You can keep pressing it to undo multiple actions in a row.
Redoing Something You Undid
Changed your mind about undoing? You can redo to bring the change back:
- On Windows: Press Ctrl + Y or Ctrl + Shift + Z
- On Mac: Press Cmd + Y or Cmd + Shift + Z
How Many Steps Can You Undo?
The builder keeps up to 50 steps of history. This means you can undo up to 50 recent actions. After that, the oldest actions are no longer available to undo.
Tip: Undo history resets when you close the builder or navigate to a different page. If you are about to make a big change and are not sure about it, save your work first. That way, if you change your mind later, you can always go back.
Keyboard Shortcuts
Keyboard shortcuts let you work faster by using key combinations instead of clicking buttons. Here are all the shortcuts available in the builder.
Essential Shortcuts
| Action | Windows | Mac |
|---|---|---|
| Save | Ctrl + S | Cmd + S |
| Undo | Ctrl + Z | Cmd + Z |
| Redo | Ctrl + Y or Ctrl + Shift + Z | Cmd + Y or Cmd + Shift + Z |
Editing Shortcuts
| Action | Windows | Mac |
|---|---|---|
| Copy | Ctrl + C | Cmd + C |
| Cut | Ctrl + X | Cmd + X |
| Paste | Ctrl + V | Cmd + V |
| Delete | Delete key | Delete key |
How Copy, Cut, and Paste Work
- Copy duplicates the currently selected element. The copy is stored temporarily and ready to be pasted.
- Cut removes the currently selected element from the page and stores it for pasting. This is like copying and deleting in one step.
- Paste places the copied or cut element at the current position.
- Delete removes the currently selected element from the page permanently. Unlike cut, it does not store the element for pasting.
Tip: Copy and paste is a great way to duplicate components you have already styled. Instead of creating a new component and styling it from scratch, copy one that already looks right and just change the content.
Tips for a Good Publishing Workflow
1. Save Early, Save Often
Do not wait until you are "finished" to save. Save after every meaningful change. This protects you from losing work and gives you a checkpoint to undo back to if something goes wrong.
2. Review Before Publishing
Before hitting publish, do a final check:
- Read through your text. Look for typos, missing words, and awkward phrasing.
- Check all device sizes. Switch through desktop, tablet, and mobile views in the frame sizer.
- Click your links. Make sure every button and link goes to the right place.
- Check your images. Make sure images load and look correct at all sizes.
3. Publish When Ready, Not When Perfect
Your site does not have to be perfect to publish. You can always make updates and publish again later. A live site that is good enough is better than a draft that never goes live.
4. Use Drafts for Big Redesigns
If you are making major changes to a live page, consider working on a separate draft page first. Once the new design is ready, you can swap it in. This way, your visitors never see a half-finished page.
5. Keep a Checklist
Before each publish, run through a quick mental checklist:
- Is all the text accurate and current?
- Do all links and buttons work?
- Does the page look good on phones?
- Are images loading properly?
- Is the page title and URL correct?
Common Questions
What if I publish and then notice a mistake?
Simply fix the mistake in the builder, save your changes, and publish again. The updated version will replace the previous one immediately.
Can I unpublish a page?
Yes. You can switch a page's status from Published back to Draft. When a page is set to Draft, visitors can no longer see it. You can do this from the page settings in the dashboard.
Does saving affect my live site?
No. Saving only stores your draft. Your live site is not affected until you click Publish.
What if my internet goes out while I am working?
The auto-save feature saves your work periodically, so you should not lose much progress. When your internet returns, your saved work will be waiting for you. If the builder is still open, you can continue working and save again once your connection is back.
Can other people see my draft changes?
No. Draft changes are only visible to you in the builder. Visitors to your site will continue to see the last published version until you publish again.
Last updated: February 12, 2026
Was this article helpful?
That’s Great!
Thank you for your feedback
Sorry! We couldn't be helpful
Thank you for your feedback
Feedback sent
We appreciate your effort and will try to fix the article